Burn iMovie Videos to DVD, Create DVD from any Videos on Mac.
Today, I will talk about how to burn 8mm videos to DVD.
What is the 8mm?
In 1932, the 8mm was created by the Eastman Kodak company. It has two types: the original standard 8 mm film (also known as regular 8 mm or Double 8 mm) and Super 8.
Intention: The standard 8mm film format was designed to create a home movie that was less expensive than 16mm film.
Advantage: Compared with standard 8mm film, Super 8mm film has a larger image area because it has smaller and more widely spaced perforations.
You may also like: How to burn MP4 to DVD on Mac?

1
f2fsoft 8mm to DVD converter
Why do I strongly recommend f2fsoft 8mm to DVD converter?
It not only can copy 8mm file to DVD, but also can edit 8mm videos before burning.
What’s more, f2fsoft DVD Creator supports a wider range of input formats, such as MKV, MP4, MOV, MPEG, FLV, WMV, AVI and more.
So, how to convert 8mm film to DVD on computer?
What do we need are f2fsoft DVD Creator software, a blank and re-writable DVD, 8mm video, computer.
First of all, you need to insert a blank and re-writable DVD with enough storage space into your DVD drive. Most computers have DVD drive, but if your computer doesn’t have one, you just need to get an external DVD drive and then connect the external DVD drive to computer with USB.
1. Launch the DVD burning software and run it.
According to your computer’s operating system, choose Windows version or Mac version. And then install the DVD burning software with the instructions.
Burn iMovie Videos to DVD, Create DVD from any Videos on Mac.
2. Add 8mm film from computer
First click Add title button and then click Import button to load one video. If you want to burn lots of videos together, click Add title button again. There will have Title1, Title 2, and Title 3…Or you can simply drag and drop the 8mm video clips into DVD Creator. In the bottom of the interface, D5 4.70G or D9 8.5G options are designed for videos' size, Standard/High Quality/Fit to Disc options are designed for adjusting videos' output effect.


3. Edit 8mm video
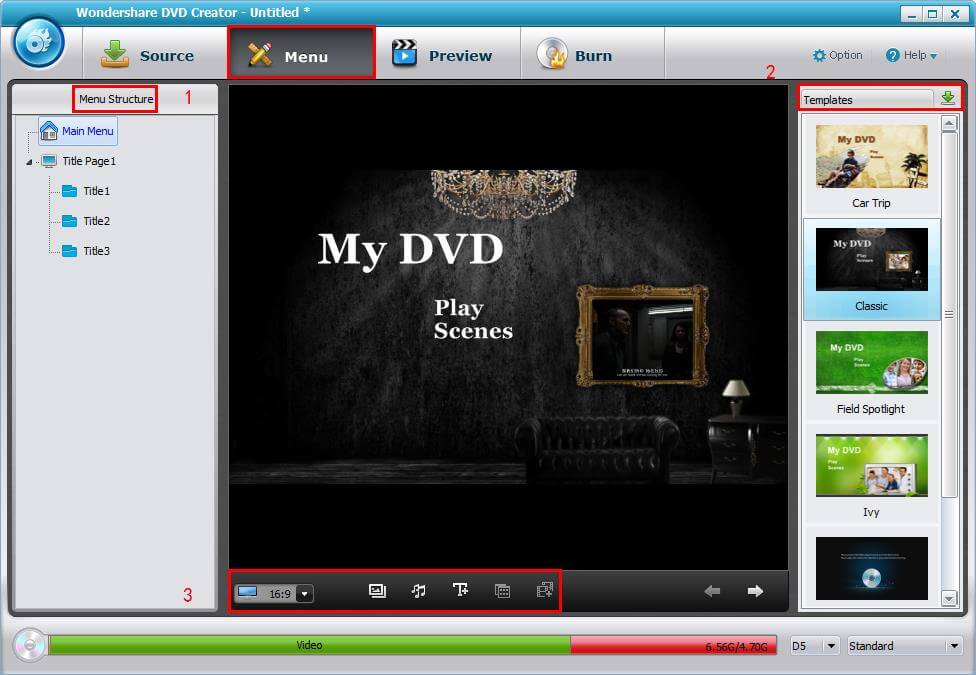
There are Source, Menu, Preview and Burn buttons on the top of the interface. Click Menu button.
You will see the Menu Structure on the left.
You can add Template on the right.
You can click Customize Background, Background Music and Add Text buttons to edit videos one by one.
You can choose 4:3 for Standard TV and 16:9 for Widescreen TV (4:3 to 16:9) on the bottom of the interface.

4. Burn 8mm film to DVD
Click Burn button, there will have a window.
In Folder Path box, we can customize to save our video.
In Setting box, we can rename our video.

2
Convert 8mm to DVD with DVD recorder
First Way
What do we need are camcorder, DVD recorder and computer.
1. Connect camcorder to DVD recorder
Connect camcorder to DVD recorder with Audio/Video cables. Please remember to connect the AV outputs of the Camcorder to the AV inputs on DVD recorder and then switch DVD recorder to AV-in, Line-in, or Aux in.
2. Put 8mm tape and a blank DVD
Put the 8mm tape into the camcorder and then a blank DVD in the DVD recorder.
3. Convert 8mm video to DVD
First press record button on the DVD recorder and then press play button on the camcorder. When the process was done, please stop the DVD recorder and camcorder.

Second Way
If we don't have 8mm Camcorder, we can also do it.
What do we need are a VHS player [adapter tape capable of playing 8mm tape models], DVD recorder and computer.
1. Insert the 8mm tape into the adapter, and then put them together into the VHS player.
2. Do the same actions as First Way.
3
Convert 8mm tapes to DVD transfer service
There are some websites online which provide the transfer service of converting 8mm videos to DVD, such as Southtree. You just need to offer the 8mm videos to them wait several days, we will get DVD finally.
Part 2: What do we need for burning DVD?
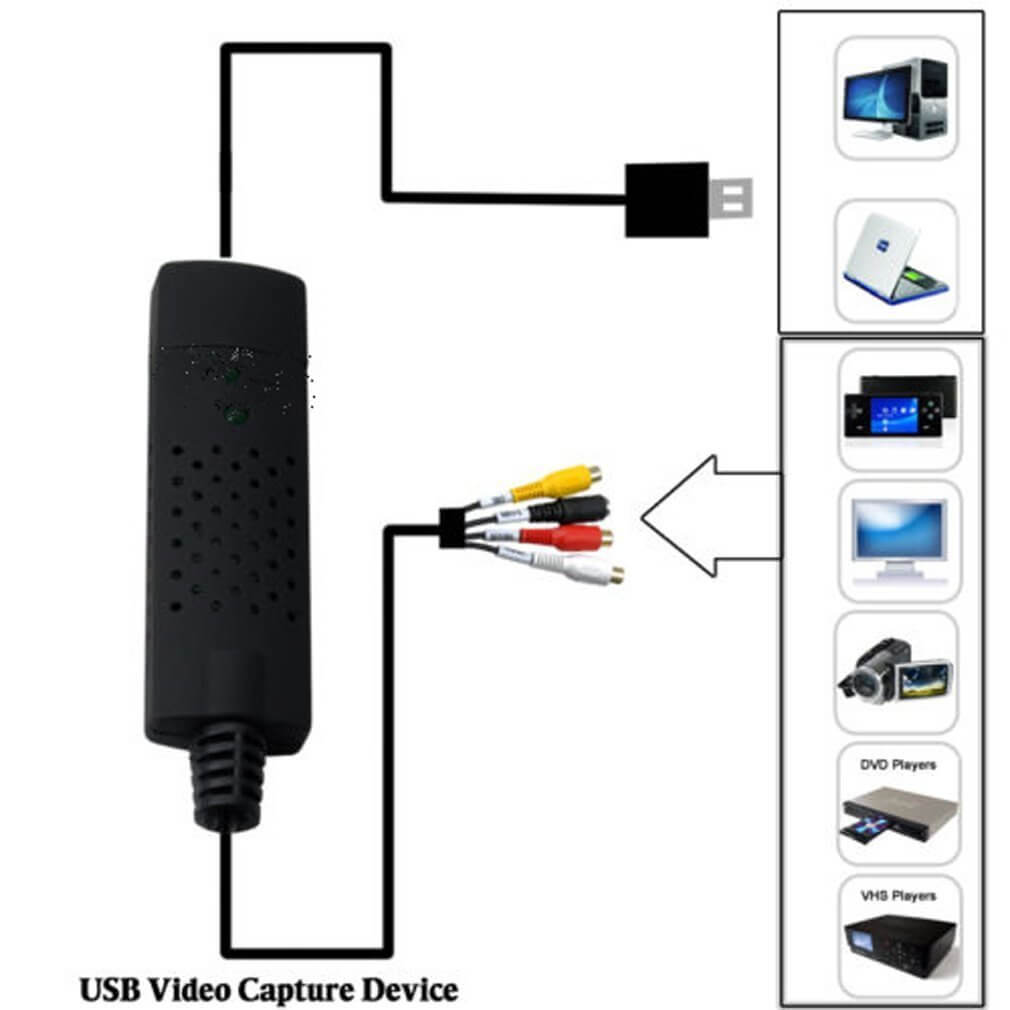
 1. Video capture card or TV card
 2. A re-writable and blank discs: DVD+RW, DVD-RW or DVD-RAW, DVD+RAW
 3. DVD Burning Software: f2fsoft DVD Creator.
Note: Some laptops have only DVD ROM which means you can only view videos but cannot burn DVD. Some might have DVD RW but may only accept disks to burn as DVD-RW and not DVD-+R. So you should check your computer disk drive before converting 8mm film to DVD.
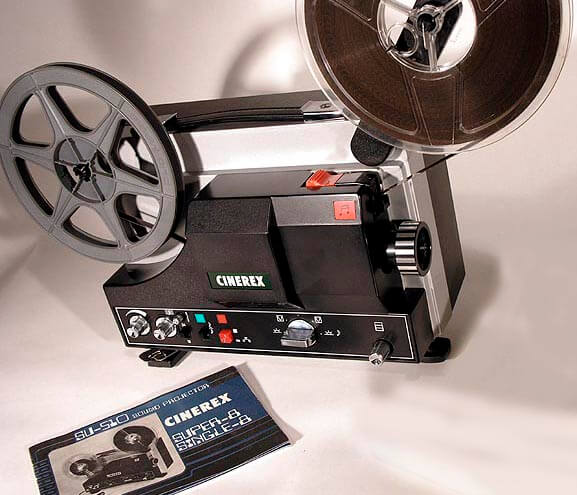
 4. An 8mm film projector that is in good to excellent condition, preferably one that allows you to control and vary the speed as well as, at the very least, a three-bladed shutter.
 5. A camcorder with shutter speed manipulation and variable exposure control.
Part 3: Why do we burn 8mm videos to DVD?
During 1930s – 1980s, to be honest, the 8mm was very popular.
However, with the development of technology, compared with mobile phone, iPad, HD-TV and more video player devices, it is outdated.
1. The 8mm video players are hardly to buy and less people use.
2. The 8mm video tapes are quite easy to be scratched and difficult to be well-preserved.
3. Hard to use: we need to remove and reverse the film in a correct way. Or otherwise 8mm film could be accidentally exposed to light, thus damaging 8mm film which contains your precious memories or represents your unforgettable past days.
Part 4: How to transfer 8mm film to computer?
I want to share you three ways to capture videos from 8mm tapes to computer.
1
What do we need are digital 8 camcorder or a digital camcorder with analog pass through or capture ability and computer.
1. Connect camcorder to computer: Connect 8mm tape camcorder to computer.
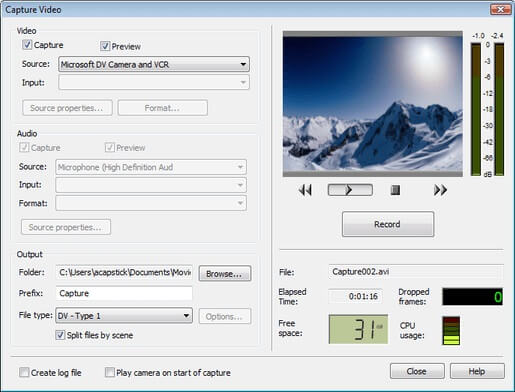
2. Download and Run 8mm video capturing software on computer: we can search “8mm video capturing software” online, choose one you like.
3. Insert the 8mm tape into camcorder: Insert the 8mm tape into the camcorder and find the tape spot where you want to begin this conversion.
4. Select output format: Select Options or Settings in the capturing software. Make sure your wanted output format in “capture format”. For example, you can choose MPEG-2 as your format because it is the best format to burn to DVD.
5. Start capturing: Select Capture on the capturing software and press Play on the camcorder. When it is finished, the captured video will be saved on the computer’s hard drive.

2
What do we need are compute, a DVD recorder and a TV tuner card.
1. Connect the 8mm tape player to the TV tuner card and launch the video recorder.
2. Insert the tapes and press the buttons to check the media content on the tapes and set the place where you want to start recording. And then you can set the export format of the video capture software as MPEG-2.
3. Play the tapes and start capturing the videos. The video will then be transferred to your computer.

Tips to capture 8mm tape video
1. Not all new digital camcorders necessary accept analog input (better to watch the lower-end models).
2. Before capturing, fast-forward 8mm tape to the end of the tape and then rewind back to the beginning before playing. This will allow for smooth playback while capturing the video.
3. If your source device has S-Video output, make sure you use that instead of composite (RCA) video output. S-Video delivers a better picture quality than composite video.
4. Make sure you have enough space on your hard drive.
Burn iMovie Videos to DVD, Create DVD from any Videos on Mac.
