Create, Convert or Burn any DVD to Blu-ray Disc, folders and ISO Image files, and photos to Bluray slideshow easily on Windows and Mac.

The last article wrote about how to burn AVCHD to DVD disc. As I mentioned in the last article that AVCHD is a high definition video format. Generally speaking, high-definition video occupies a large resources space as the reason for recording density. Therefore, if the recording time of the AVCHD file is not too long, or the capacity of the file is not too large, it is a good choice to storage AVCHD with the DVD disc. On the contrary, if the recording time of original AVCHD video is long and the capacity is large, the AVCHD file needs to be burned to a high-capacity Blu-ray disc. In addition to the complete storage of original video, another advantage of burning AVCHD to Blu-ray Disc is that the original video quality will not be damaged. The article as the following will show you how to burn AVCHD to Blu-ray disc.
How to Burn AVCHD to Blu-ray disc
On the whole, the steps on burning AVCHD to Blu-ray are similar to burn AVCHD to DVD disc. The difference is that you need to prepare one blank & writable Blu-ray disc and one Blu-ray disc recorder drive instead of DVD ones.
Step1: Download and install f2fsoft Blu-ray Creator on the computer
Create, Convert or Burn any DVD to Blu-ray Disc, folders and ISO Image files, and photos to Bluray slideshow easily on Windows and Mac.
Step2: Import AVCHD video/file
f2fsoft Blu-ray Creator support to convert and burn videos, photos, video/photo files to Blu-ray/DVD disc and/or ISO Image file. You could freely trim video length, add watermark, apply 3D effect and remove background noise. Besides, you can create your own videos with pictures, and design the disc menu.
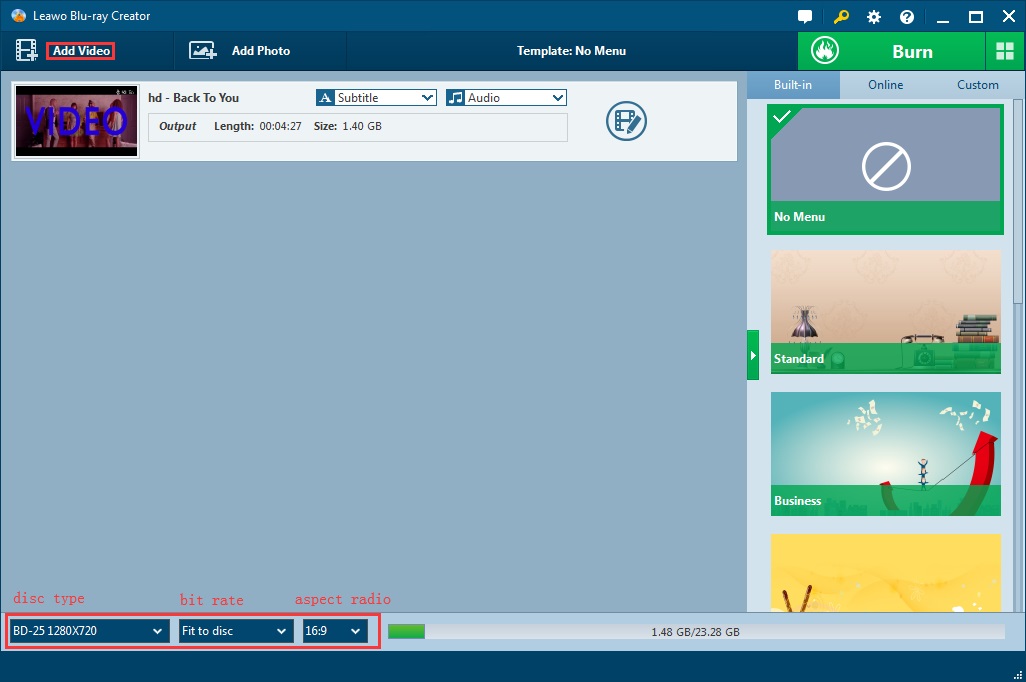
1. Press Add Video button to download the AVCHD video/file to this AVCHD to Blu-ray burner.
2. Insert the Blu-ray disc into the Blu-ray disc recorder drive and connect it to the computer via USB cable.
3. Select the BD type, bit rate (fit to disc) and aspect radio.

Step3: Edit output AVCHD video (optional)
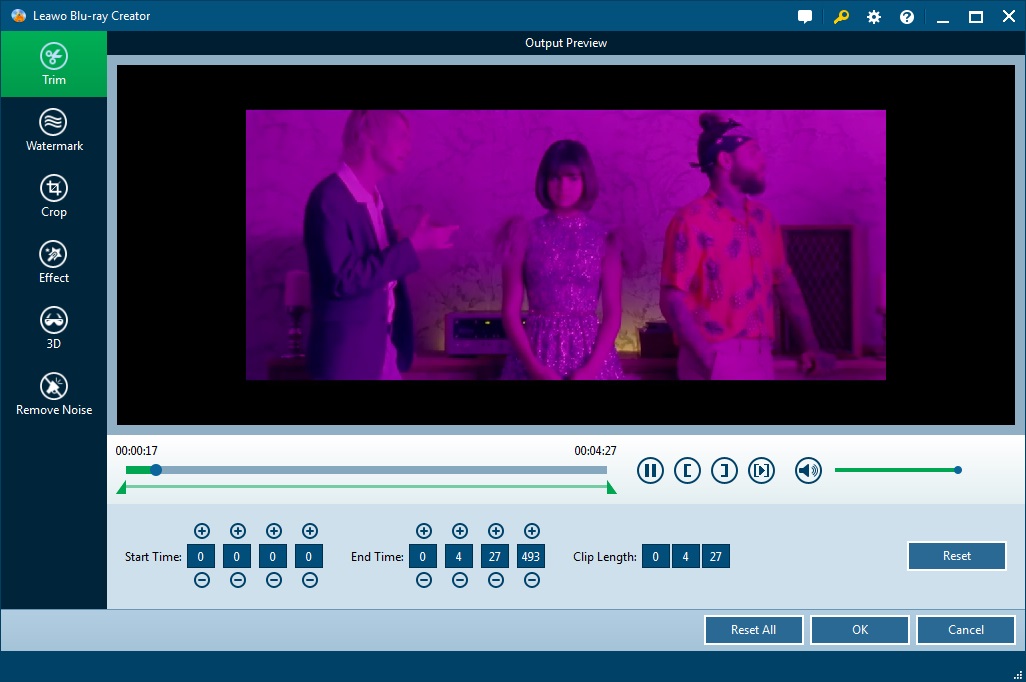
Click the pencil icon on the end of the video list to edit the video. You could trim the video length, crop frame size, add text/image watermark, adjust picture effects, apply 3D effect and remove background noise.

Step4: Make a disc menu (optional)
Pick one template from the right sidebar; click the eye icon in the middle for an instant preview. Behind the eye icon is a pencil icon, by clicking which to customize a disc menu you like with background music and image. Save it for future use.

Step5: Burn AVCHD to Blu-ray disc
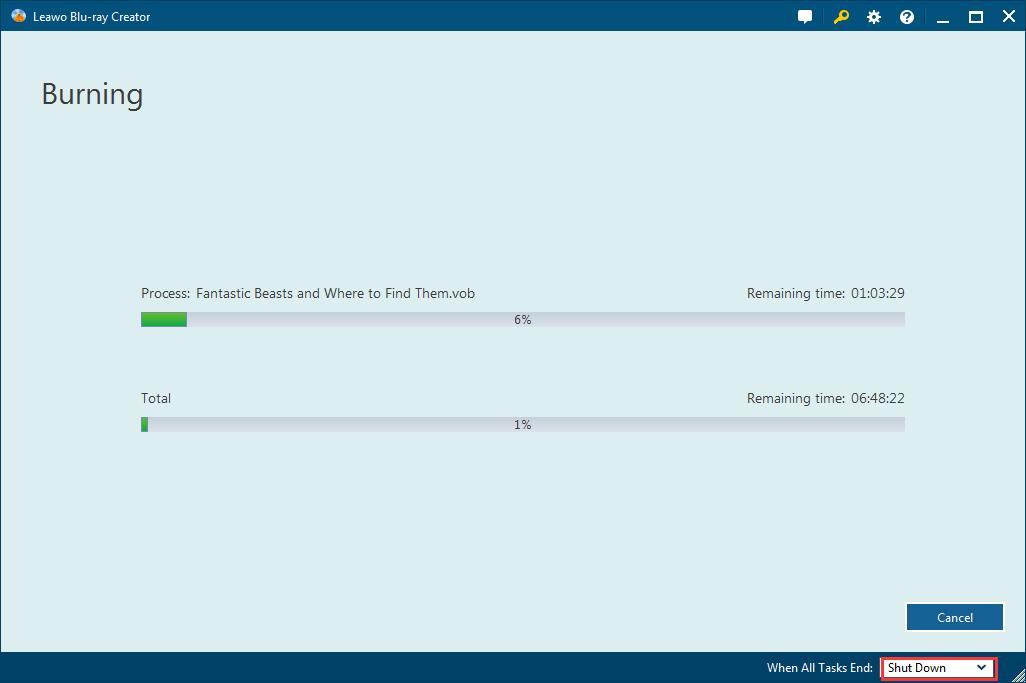
Click the big green Burn to finish disc label. You could burn the output video to folder and ISO Image at once, if you want to do this operation, please make sure the disk hard drive of the computer is enough, and decide the location saving the folder/ISO image file. Finally, hit the flame icon to start burning the AVCHD video to Blu-ray disc.


If you have the demand to play ISO Image file, you could read how to play Blu-ray ISO on PC as a reference. Besides, you can follow the steps above to convert 2D to 3D one and burn videos to DVD or BD.
Create, Convert or Burn any DVD to Blu-ray Disc, folders and ISO Image files, and photos to Bluray slideshow easily on Windows and Mac.
You May Also Like to Read:
- How to Do MKV File to DVD Creation on Windows
- How to Do FLV to Blu Ray Disc Creation with Blu Ray Creator
- How to Completely Create DVD to Blu ray Disc on Windows
- How to Create Any DVD to Blu ray Disc on Mac
- How to Burn Video to DVD on Windows
- The Best Way to Burn MP4 to DVD
- Best Windows DVD Maker- How to Make a DVD on Windows
