MTS Video Converter-Convert MTS to DVD with Subtitle
I believe you are not strange in MTS movies supposing you are a movie fan, right? Well, you may often see MTS files when downloading movies from the internet, but you really understand what MTS is? This article will tell you what MTS is and how to burn MTS to DVD with MTS video converter.
The MTS file is a video file with the suffix MTS. The MTS format is new high-definition video format whose video coding is H.264, audio coding is AC-3, and resolution is full HD standard or 1440*1080. When the video is not captured, the format displayed on the software and the camera is MTS. After being captured by software, MTS file will turn to M2TS format file.
Part1: Some preparations and information you should know
1. Generally, users could burn DVD disc with Blu-ray creator, but could not burn Blu-ray disc with DVD burner, which sound like you are able to play both BD and DVD on Blu-ray player, but unable to play BD on the DVD player.
2. You need one blank and writable DVD disc and one DVD disc recorder drive (if your computer does not support to read DVD disc).
3. Download and install MTS video converter-f2fsoft Blu-ray Creator on the computer.
f2fsoft Blu-ray Creator is one piece of comprehensive software. It is not only one Blu-ray burner, but also one DVD maker. You could convert and burn videos to DVD/BD by one click and thus you don’t need to convert the video to the format compliant to DVD/BD in advance. The built-in video editor for you to trim video length, crop frame size, add watermark, convert 2D movie to 3D, and remove background noise. f2fsoft supports to burn almost video like YouTube, AVI, MP4, iMovie to BD or DVD. Besides, you can make videos with pictures or create ISO Image file with it.
Part2: Steps to convert MTS to DVD disc
Step 1: Add MTS movies
Run f2fsoft Blu-ray Creator on your computer. See the Add Video button? Simply click it to import MTS movies to this MTS video converter, or directly drop/drag the movies into the main page. On the left corner of the video list is a Play button in a triangle pattern, by clicking which you could preview the movies. If you meet the pictures that you want to save, press the camera icon to have a snapshot. The pictures can be found in the file behind the camera button.


Step 2: Edit MTS movies and make a disc cover (Optional)
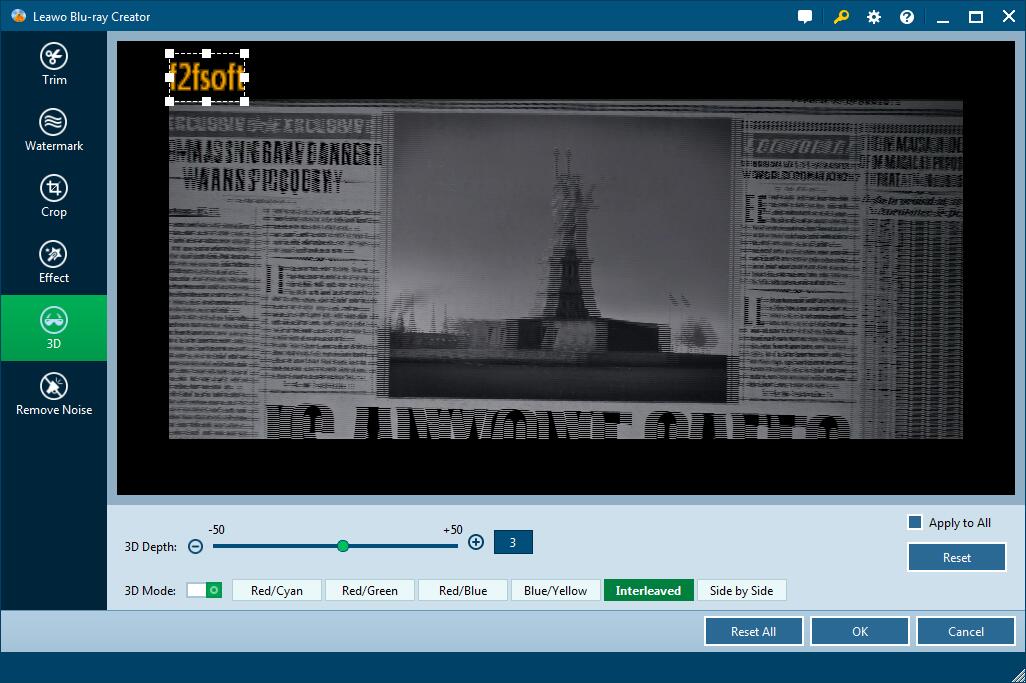
Right-click the loaded movies to select Edit option or directly click the roll film icon to edit MTS movies. Six functional buttons are listed on the left sidebar: according to your needs to trim the video length, add watermark (To protect copyright), crop video size, adjust the brightness, contrast, saturation, and volume zoom of the output movies, apply the 3D effect, and remove background noise. Then click the OK button to save the edition of the video.
Select one template as the disc cover from the right sidebar. If you don’t need a menu, just click “NO Menu”. It is a good choice to customize one by yourself. Click the eye icon in the middle for an instant preview. Hit the pencil icon behind to add background music and images in your style. You could add video to create a dynamic image. Then save it to Custom panel for future use.

Step 3: Add external subtitle
Come back to the main page, there are two options for Subtitle and Audio. Click Subtitle and then tick Add Subtitle to import the subtitles you wanted to this MTS video converter. Before that, please make sure the subtitle file is included in the movie file.

Step 4: Burn MTS to DVD
1. Insert the blank and writable DVD disc into the disc recorder drive which is connected to the computer. Set up the DVD type, bit rate (Fit to disc), and aspect ratio. Please check whether the DVD type is consistent with the disc you have inserted and make sure that the capacity of the disc you’ve insert is enough. Normally, DVD-5 can store a 110 minutes long movie and DVD-9 can store a 230 minutes long movie.
2. See the big green Burn button at the top right corner? Over the Burn button is a wheel icon, click it to choose Default Video Mode from Burn option.
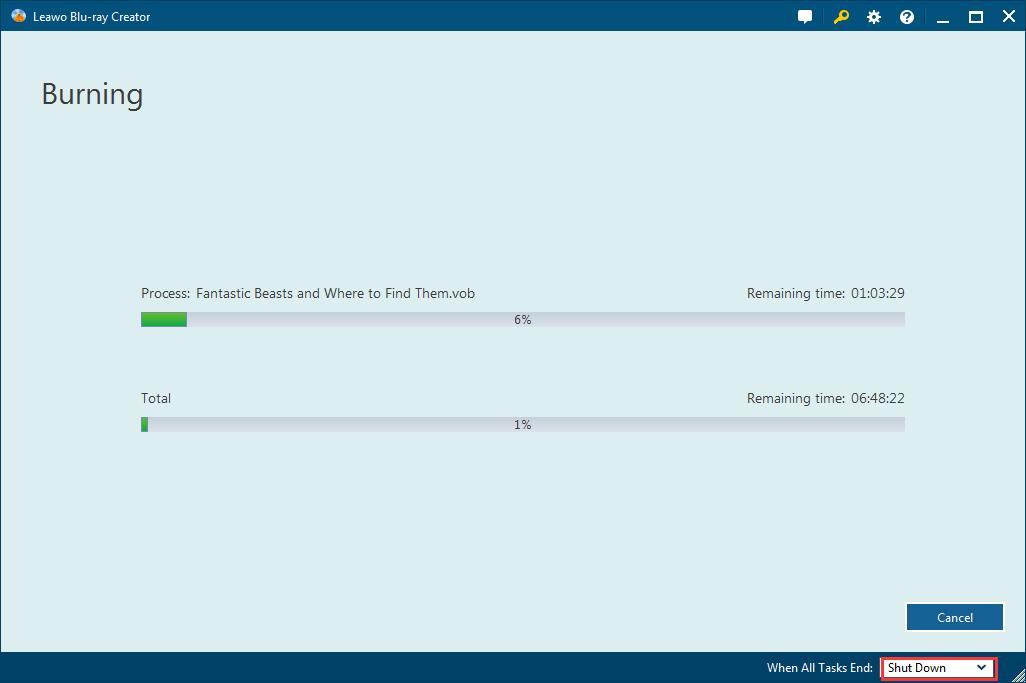
3. Then press the Burn button to decide disc label and the location saving the output movie file and ISO Image file. Finally, click the flame icon to start burning the movie to DVD disc.


The burning time depends on the size of the output movie. The bigger the video is, longer the time. You can set up to shut down the program when the task ends.
You May Also Like to Read:
- How to Do MKV File to DVD Creation on Windows
- How to Do FLV to Blu Ray Disc Creation with Blu Ray Creator
- How to Completely Create DVD to Blu ray Disc on Windows
- How to Create Any DVD to Blu ray Disc on Mac
- How to Burn Video to DVD on Windows
- The Best Way to Burn MP4 to DVD
- Best Windows DVD Maker- How to Make a DVD on Windows