Create, Convert or Burn any DVD to Blu-ray Disc, folders and ISO Image files, and photos to Bluray slideshow easily on Windows and Mac.

Watching movies on a regular DVD player or wide-screen TV with your family or friends, especially the HD or UHD TV sets, can be a pleasurable experience due to the high image and sound quality.
If you have a lot of movies downloaded or purchased from iTunes Store, you might have the urgent need to watch those iTunes movies on your smart HDTV but have no idea of how to do it. In other cases, you might also want to back up the iTunes movies to normal DVD disc to save the storage space or you want to backup them to DVD just for collection.
However, it's not an easy task to burn iTunes movies to DVD disc directly because of the DRM protection, as everybody knows, which is inserted to protect them by Apple. So, how to remove DRM protection and then burn iTunes movies to a DVD disc. Here, f2fsoft Blu-ray Creator is one of the best choices.
Part1: What’s DRM
Digital rights management (DRM) is a set of access control technologies for restricting the use of proprietary hardware and copyrighted works. DRM technologies try to control the use, modification, and distribution of copyrighted works (such as software and multimedia content), as well as systems within devices that enforce these policies.
You might seek an effective way to remove DRM from iTunes videos in order to burn iTunes movies to DVD no matter for backup or playing on a DVD player. In fact, many easy-to-use tools exist for converting iTunes DRM videos such as f2fsoft Blu-ray Creator, with which the conversion between MOV, VOB, MKV, or any other popular video formats and DVD can be easily achieved.
Create, Convert or Burn any DVD to Blu-ray Disc, folders and ISO Image files, and photos to Bluray slideshow easily on Windows and Mac.
Step1: Add source videos
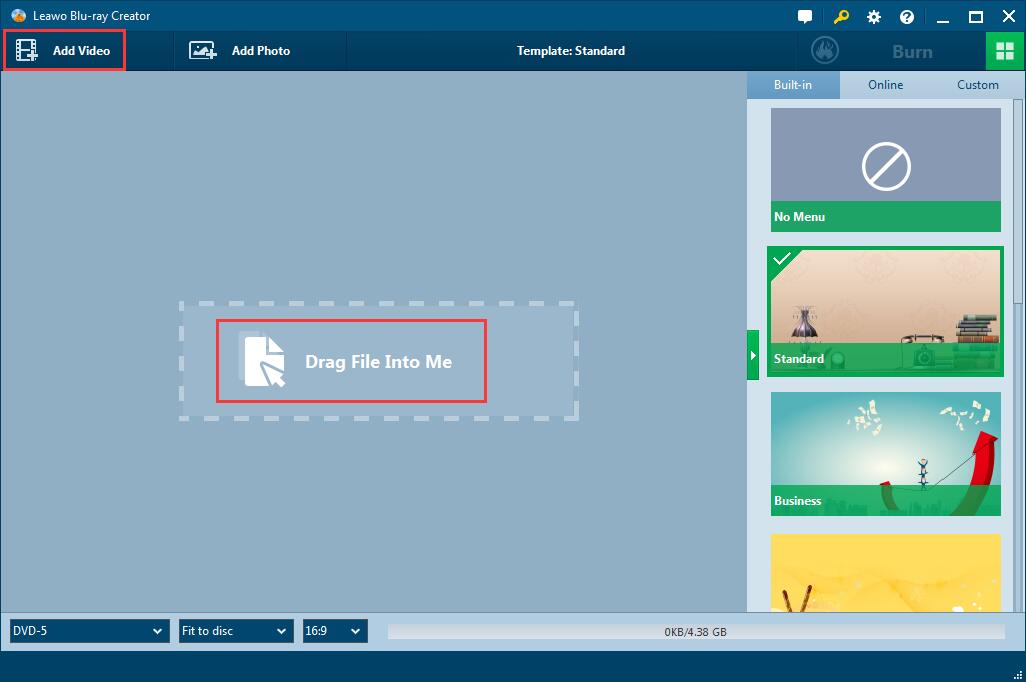
Open the program and add iTunes videos to this converter by clicking Add Video or drag/ drop it to the main interface of the program. You can add more than one video.

At the bottom of the application, you can set the output DVD disc type according to your own DVD disc you’ve inserted into the DVD recorder drive. (BD-25 1280×720, BD-25 1920×1080, BD-50 1280×720, and BD-50 1920×1080). Bit rate is recommended to choose fit to disc option. You can also set the output aspect ratio as 16:9 or 4:3.
Step2: Edit and customize (Optional)
This step is optional. That is to say, if you want to edit the video or design the target DVD menu, follow this instruction; if not, skip it. Press buttons beside the videos and edit your video by trimming, cropping, adding 3D effect, and etc. If you want to customize target DVD, there are a lot of template models on the right sidebar you could choose from. Select a disc menu, click the eye in the middle of the menu template to get a preview and edit it.

Step3: Do more burning settings
When you have finished editing the video or you needn’t do editing, click green Burn button on the top of the application. Here, in Burn to module, you are able to choose to burn videos to DVD disc. The target file could be named in Disc Label mode and choose the destination to save the output file in Save to box.

Step4: Start Burning
Once you have finished all settings, click Burn button on the setting sidebar to start burning your iTunes videos to DVD. The process takes several minutes.

Now, iTunes videos have totally been burned to DVD and you can enjoy them freely in your wide-screen player.
Create, Convert or Burn any DVD to Blu-ray Disc, folders and ISO Image files, and photos to Bluray slideshow easily on Windows and Mac.
You May Also Like to Read:
- How to Do MKV File to DVD Creation on Windows
- How to Do FLV to Blu Ray Disc Creation with Blu Ray Creator
- How to Completely Create DVD to Blu ray Disc on Windows
- How to Create Any DVD to Blu ray Disc on Mac
- How to Burn Video to DVD on Windows
- The Best Way to Burn MP4 to DVD
- Best Windows DVD Maker- How to Make a DVD on Windows
