Burn iMovie Videos to DVD, Create DVD from any Videos on Mac.
“ Ask: I made some videos that I would upload to YouTube. Before doing so, I want to add watermark to video preventing someone from ripping my videos and claim it as their own. Is there any free watermark software recommended? ”
Tom
What is watermark?
A watermark is a still image overlapping with a video or papers. It can cover the entire dimension of the video, sit in the center of the video or neatly place in one of the corners. It can be opaque, but most of the time it is transparent and will not trouble the video itself. Watermarks are usually some kind of logo or text as well.
Why you need watermark your videos?
We are in a time of source sharing. Excellent works will be seen by many people after they are uploaded to the sharing platform. It is one thing being delighted to hear and see for original owners of the videos. Because they can take this opportunity to attract more people to appreciate their works and insomuch promote the brand. However, every coin has two sides; some opportunistic persons might clip the videos, potentially stealing way viewers and revenue. It is really annoying. So what can be done to avoid this happening? It is very simple, you just need to add watermark to video. This article teaches you how to add watermark with f2fsoft DVD creator.
what can f2fsoft do for you?
a. Burn all format videos (MP4, MKV, FLV, iMovie, MOV) and files to DVD/folder/ISO file.
You may need How to Burn ISO to DVD on Mac.
b. Edit videos before burning: add watermark & subtitles; trim unwanted part; adjust picture effect.
c. Make videos from photos with background music and images.
Burn iMovie Videos to DVD, Create DVD from any Videos on Mac.

Step2: add watermark to video
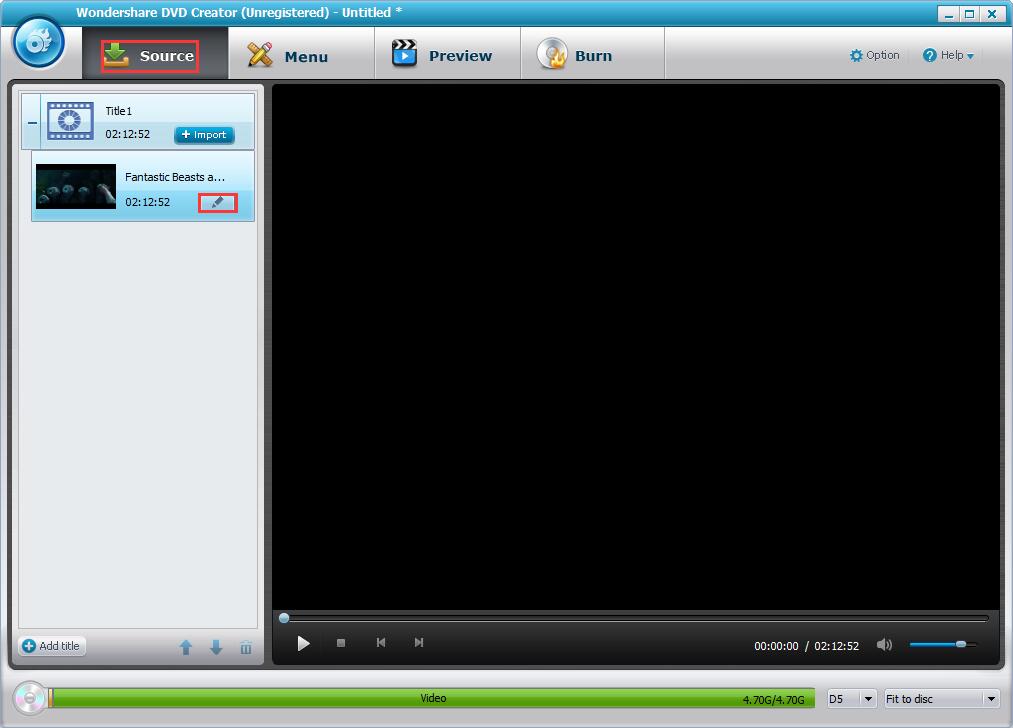
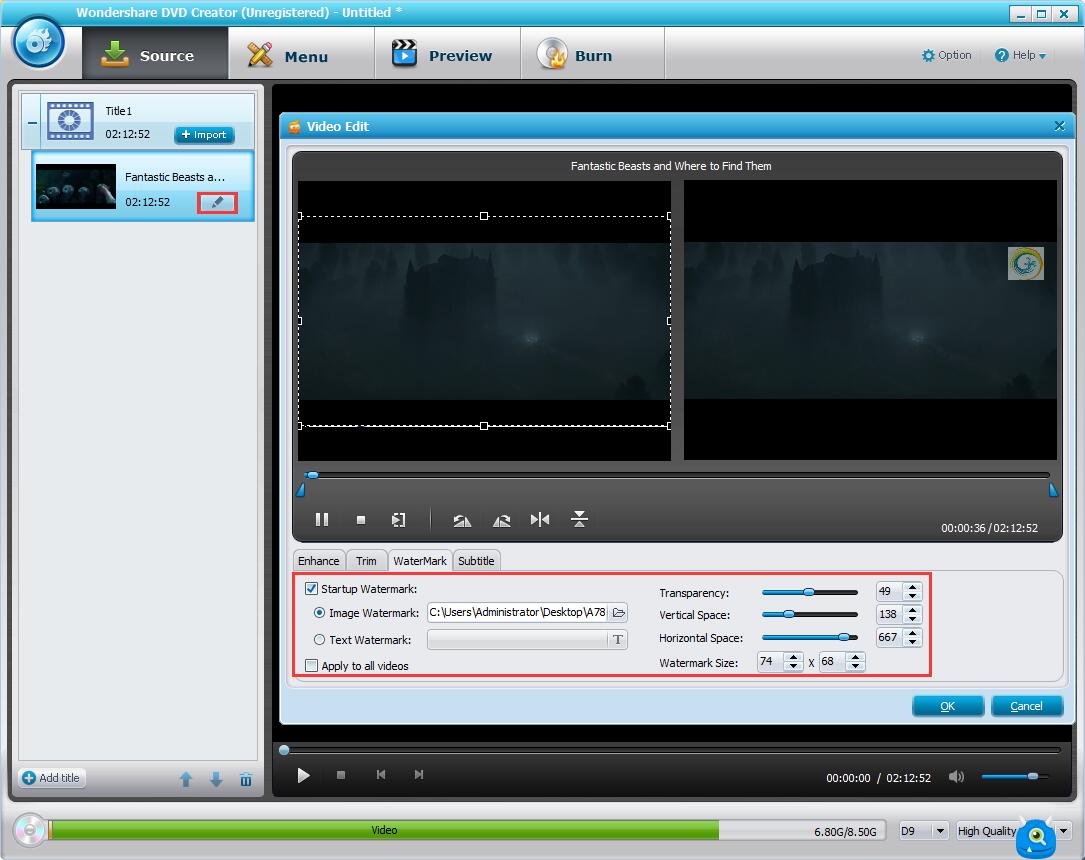
To trim the unwanted part, crop video, add watermark to video, or do other editing functions, press the pencil-like icon on the thumbnail entering Video Edit windows. Pitch on Watermark option and tick Startup Watermark. Want to add a brand logo? Choose Image Watermark and load the logo from the local PC. If you only need a text watermark, tick the option under the image watermark, and input the content. Remember to adjust the transparency, vertical/horizontal space and size of the watermark. Click OK to save the changes.


Step3: create DVD menu (optional)
If you are not planning to burn video to DVD, just skip to Step4.
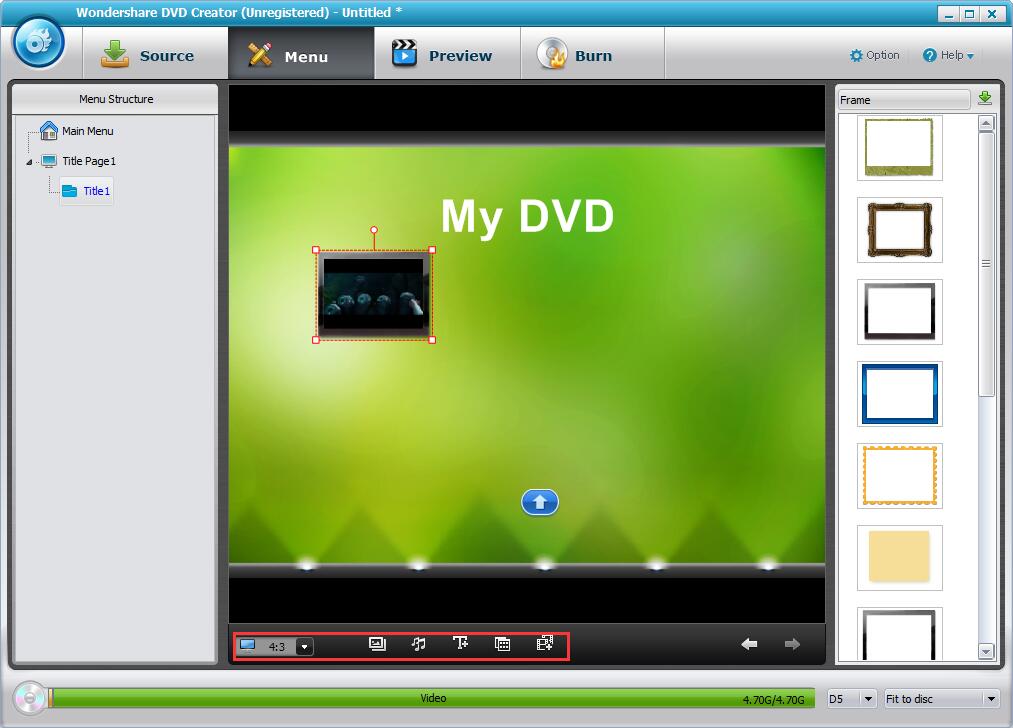
Move to Menu tab, pick one template from the right sidebar and double click to apply for your DVD. To customize the template with features like add background music/image, adding text, customizing thumbnail, creating chapter and changing aspect ratio, select respective icons at the bottom.

Step4: preview and burn video to DVD or ISO
Preview video
Switch to Preview tab to check the edited DVD, if any further changes are needed, you could go back to re-edit.

Burn video to DVD (optional)/ISO
Here comes the last step, it is optional to burn the video to DVD or just save it as ISO to PC. Don’t forget to prepare one blank DVD in advance to burn to DVD.
Go to Burn tab and select TV Standard in Option plate. The TV standard between two countries may differ, insomuch make sure you get the right one.
Decide the folder path of where to save the file and/or name the disc label. Tick Burn to disc and/or Save as ISO and then click the blue Burn button for conversion work.


So far, the work of adding watermarks has come to a successful conclusion.
Burn iMovie Videos to DVD, Create DVD from any Videos on Mac.
You May Also Like to Read:
- How to Burn MKV to DVD on Windows Fast and Safe
- How to Burn ISO to DVD on Mac with f2fsoft DVD Creator
- [Simple Steps] Show you How to Burn iMovie to DVD on Mac
- [How to Burn Photo to DVD/ISO for Playback on any DVD Player
- How to Make a Video with Photos and Music with DVD Creator
- The Best Way to Burn MP4 to DVD
- Best Windows DVD Maker- How to Make a DVD on Windows
