Create, Convert or Burn any DVD to Blu-ray Disc, folders and ISO Image files, and photos to Bluray slideshow easily on Windows and Mac.
AVI is a very popular video format on PC and internet, is a multimedia container format introduced by Microsoft, and can contain both audio and video data in a file container.
ISO covers all the data of files contained on the archived CD/ DVD or any other disc format. Many people love to save their favorite videos or movies as ISO files for backup on computer.
As a result, convert AVI files to ISO file is a requirement for many people, so that they can save their AVI videos for a long time and share it with friends.
The best solution to convert AVI to ISO is to use an ISO converter. In this article, you are going to learn how to rip AVI to an ISO file with fast ripping speed and lossless video quality.
Part1: Choice of AVI to ISO converter
f2fsoft Blu-ray creator is a professional ISO maker that are capable of ripping 180+ video formats to ISO image file, including MP4, WMV, MKV, FLV and AVI. Except from these popular video formats, creating ISO files from DVD can also easily achieved by this tool. In addition, a built-in video editor is provided for you to personalize and customize your videos. Furthermore, high-quality burning and high speed are available by using this tool.
It’s not only an ISO maker but also a powerful DVD/ Blu-ray Creator that can burn all sorts of videos including iPhone videos, common SD videos, and convert into DVD/ Blu-ray folder for backup on PC.
According to your operating system, download the right version and check out the steps below to preserve and share your AVI videos by making an ISO image file at ease.
Part2: Steps to convert AVI to ISO image file
This guide uses f2fsoft Blu-ray Creator for Windows screenshots. The way to finish the task on Mac is the same. So just make sure you get the right version according to your situation.
Step 1: Open the ISO maker
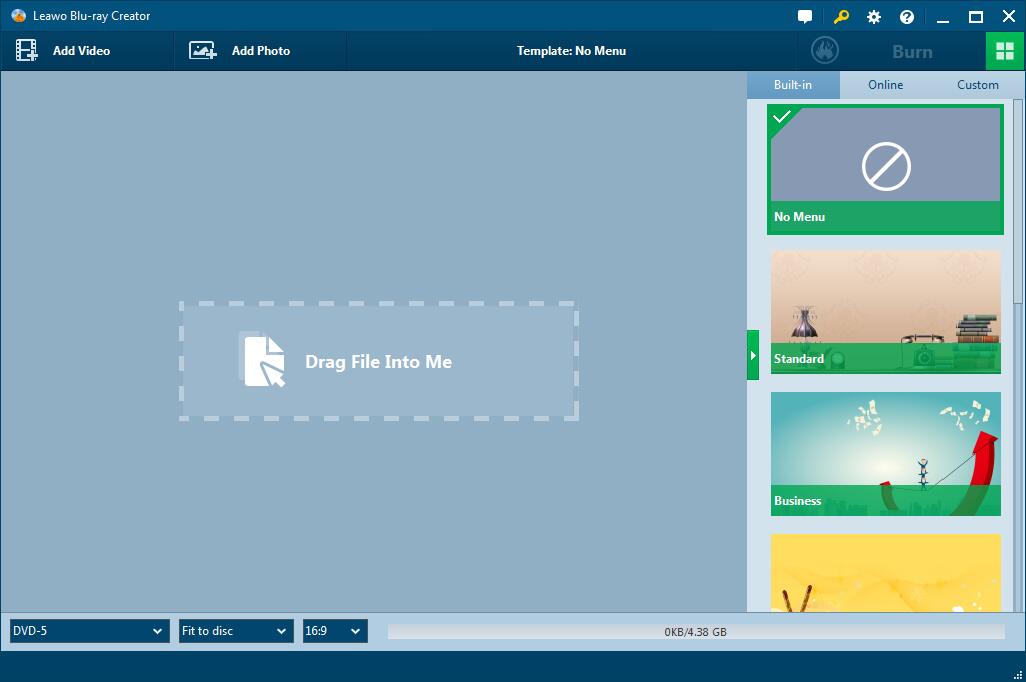
Download, install and run f2fsoft Blu-ray creator. Once open, you can see the main interface as below.
Create, Convert or Burn any DVD to Blu-ray Disc, folders and ISO Image files, and photos to Bluray slideshow easily on Windows and Mac.

Step 2: Add source AVI files
Click Add Video to select and import videos or directly drag videos to the item bar. You can also load videos in other formats to rip. All added files will be displayed on the middle panel and you are free to add subtitles or audios for sources videos. When adding files, you should pay attention to the bottom bar that shows the size of loaded videos and make sure your video size doesn't exceed the capacity of your hard drive. You can change the basic, video and audio setting including video size, video aspect, video bitrate, etc. at the bottom of the main interface.

Step 3: Edit source videos
Edit the videos before the conversion if you wish to. You can click the pencil-shaped icon beside each video to clip, crop, trim videos or add watermarks, etc. Trim focuses on assigning new video length. Effect focuses on changing and improving audiovisual effect of the video. Crop focuses on defining new video screen size. Watermark focuses on applying image or text as watermark.

Step 4: Convert AVI to ISO
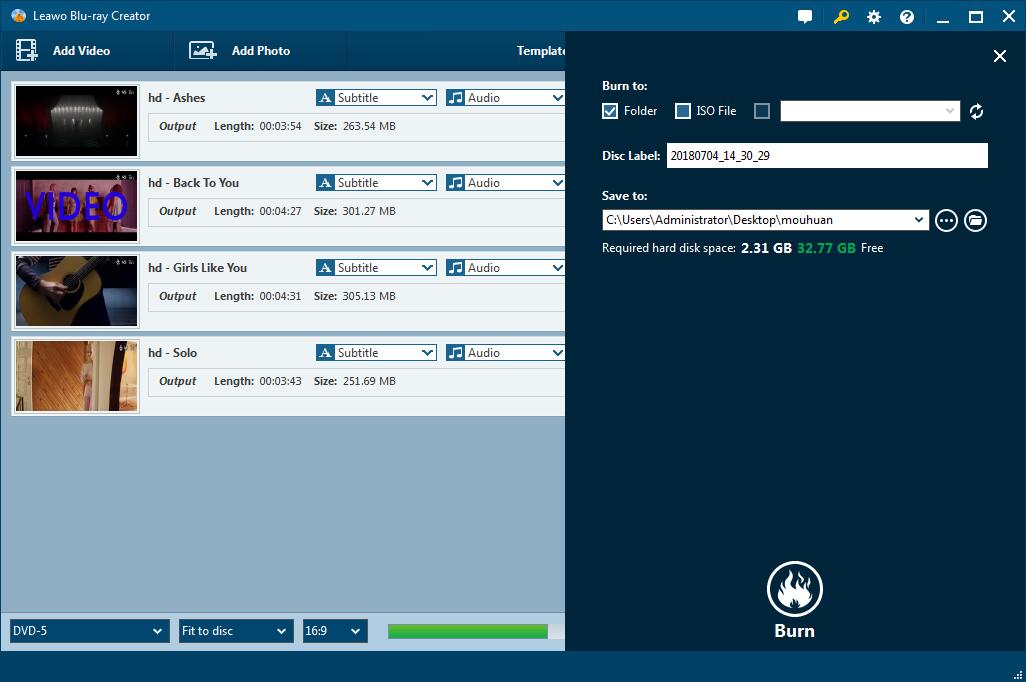
Check if everything is set correctly, if you have all your preferences set. Click the green Burn button and choose the output file options. You could also name the ISO folder and select a Save to address.
Ensure you have done all the settings then click Burn in the bottom to start it off.


Create, Convert or Burn any DVD to Blu-ray Disc, folders and ISO Image files, and photos to Bluray slideshow easily on Windows and Mac.
You May Also Like to Read:
- How to Download and Burn YouTube Video to DVD
- Burn iTunes Movies to DVD Disc for Playing on Home DVD Player
- Windows DVD Maker- How Windows Users Burn VLC Files to DVD
- How to Convert/ Burn AVI to DVD in a Few Steps
- How to Create ISO from DVD and Burn ISO to Blu-ray Disk
- MPEG Converter- How to Easily Burn MPEG to DVD Disc
- M4V Converter – How to Convert QuickTime M4V to Blu-ray/ ISO
