Android Data Recovery|4 Steps to Recover Deleted Data from LG V30
LG V30 is a rock-solid alternative to Samsung’s Galaxy S8 Plus and the Google Pixel 2 XL. It was well-received upon its launch in November 2017, especially in the camera department. You could shoot a bunch of wonderful pictures with it. But it is pretty common to delete files from Android smartphone by mistake when operating your device, LG V30 is no exception. So you might have deleted a precious photo or an entire folder of photos from your phone. Or worse, you broke or reset your phone and lost all the data.
What can you do to recover deleted data from your Android smartphone?
Can we recover files from the recycling bin? But the truth is that there's no recycle bin for Android devices. Don't worry. Android Data Recovery lets you restore lost pictures from Android devices, as well as text messages, contacts, music, and etc.
Now, download the free trial version of Android Data Recovery on your computer and try to recover your Android phone files.

Download Android Data Recovery FREE Now!
Directly retrieve deleted text messages, contacts, videos, and etc.
Recover lost Android data due to factory settings, deleting, rooting, etc.
Support multiple Android phones and tablets, like Samsung, HTC, LG, Motorola, Google, and so on.
Preview and selectively restore messages, contacts, photos and videos before recovery.
Easy Steps to Recover Deleted Data from LG V30
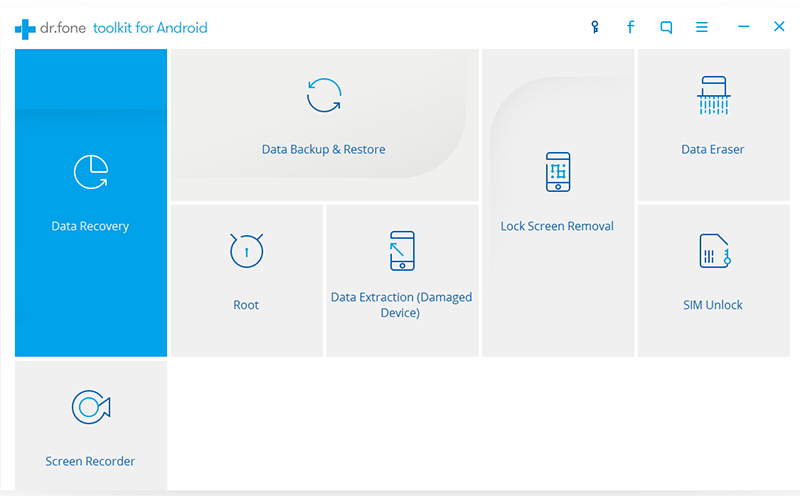
Step 1 Connect LG V30 device to the computer
Download, install and run the data recovery program on your computer. Select Recover in the primary window. Then connect your device to the PC using a USB cable. During the process, do not run any other software on Android phone.
Step 2 Select file types you want to recover
Once your device is detected successfully by the program, you can see the window below. Check the file types you want to restore to your phone or select all, then click Next to continue. (If you fail to connect your device to the computer, just try to enable the USB debugging on your device. The program will give you instructions about how to do that.)

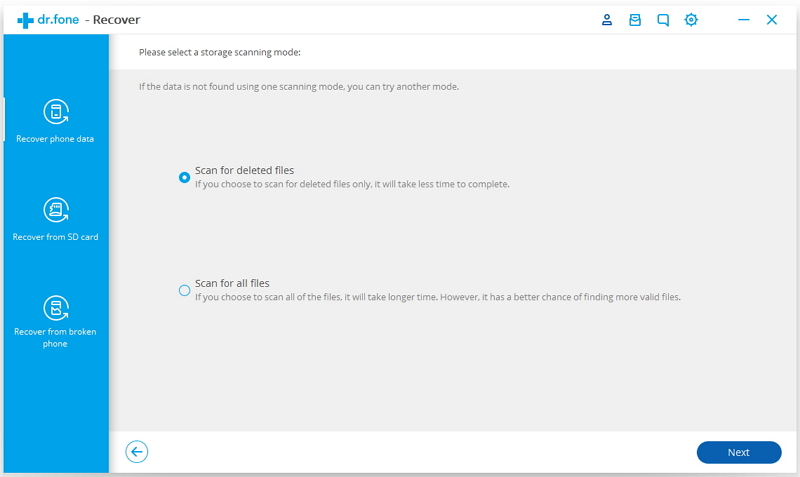
Step 3 Choose a scanning mode
Then you can see there are two modes of scanning the data for your choice. If you choose to Scan for deleted files only, it will take less time to complete. If you choose to Scan all of the files, it will take longer time. However, it has a better chance of finding more valid files. Next, click Start to continue.
Step 4 Preview and Recover
After the scanning, the window will show you all the data found. You can preview all you lost data in the scan result. Then mark the data you want to restore and click Recover to save them on your computer.

You May Also Like to Read:
- 3 Ways to Restore Deleted Contacts from Samsung Galaxy
- How to Recover Text Messages from Android on Windows
- How to Recover Data with Android Data Recovery Software
- How to Recover Deleted Android Photos
- No Backup, How to Do Android Data Recovery on Windows
- Two Quick Methods about Android Photo Recovery on Windows
- Android Data Recovery on Windows