Transfer data (contacts, videos, pictures, text messages and so on) for iPhone users.
It is not exaggerating that iDevices are an important part of our life. Like iPhone, iPod and Apple computer.
We often use iPod to play songs and videos.
But, can you imagine that your iPod suddenly broke or crashed at someday, all your songs can't play? What would you do?
Luckily, I want to tell you that you still have these songs on your iPods, what you need to do is carefully transfer them from iPod to a computer.
So, how to transfer music from iPod to computer?
What do we need are f2fsoft iOS Data Transfer, iPod and computer.
When you are ready, connect your Apple device to your computer. Note:
In order to avoid disable the connection between iPod to a computer, please prepare a USB 2.0 port
Part1: Transfer music from iPod to computer with f2fsoft Music Transfer
f2fsoft iOS Data Transfer is a powerful tool, which can Transfer contacts, music, text messages, videos, photos and so on to other iDevice without data overwrite or loss.
When it comes to copying music from iPod to a computer, we may first think about iTunes. To be honest, iTunes can solve our problem, such as move purchased songs from iPod to a computer. However, if we want to sync all the songs, including non-purchased songs, f2fsoft iOS Data Transfer will be a good choice.
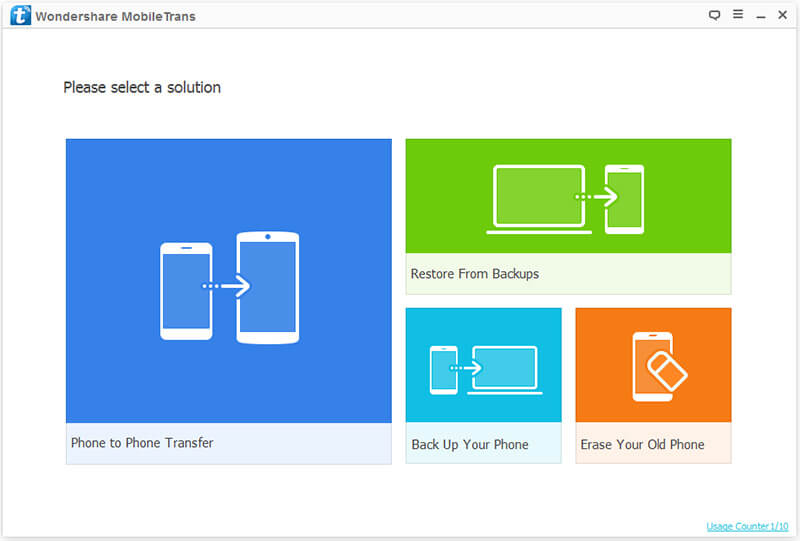
Step 1: Download and install f2fsoft iOS Music Transfer software on your PC. Install and open it, you will see a simple interface.
Transfer data (contacts, videos, pictures, text messages and so on) for iPhone users.
Step 2: Select Back Up Your Phone part and connect iPod to computer with USB. Wait for a second; f2fsoft iDevice Music Transfer Software will detect your iPod.
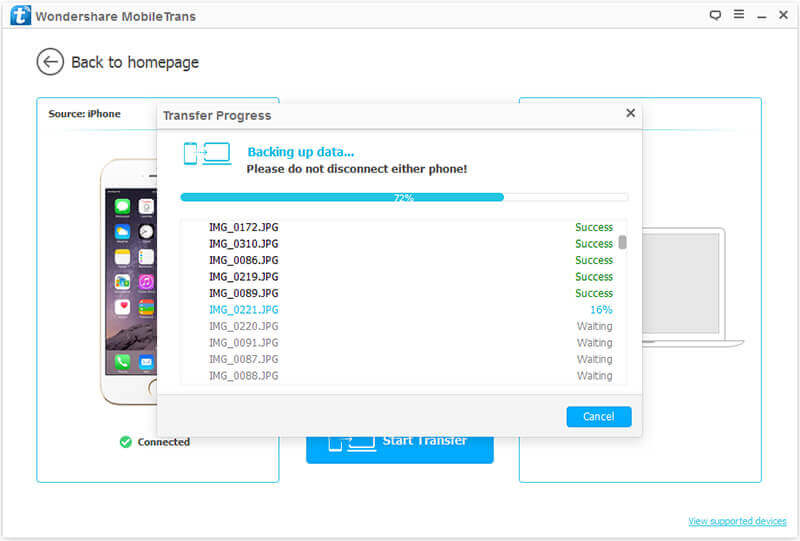
Step 3: Then a list of your iPod data will be shown in the window. Click Music and Start Transfer button.
Part2: Copy music from iPod to computer with iCloud Music Library
The common function of iCloud is backup data. At the same time, it also can manage your music.
We need iPod, USB cable, computer and the latest iTunes.
Attention: this way only applies to newer Apple devices with Apple Music.
If you have an old iPod (especially a model before the iPod Touch) then iCloud probably won’t be able to help you.
In this case, move down to our second option. If you have a newer model, follow these steps.
Note that your device doesn’t have to be plugged in for this process, so it still works even if you can’t plug your device into the chosen desktop.
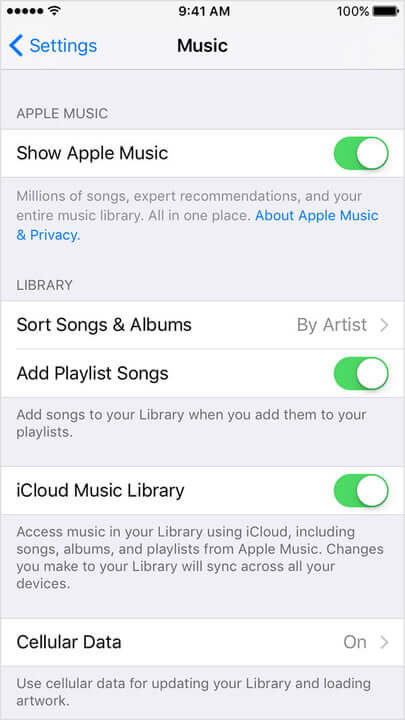
Step 1: Click Settings> Music> turn on iCloud Music Library.
Step 2: Run and open iTunes on your Mac or Windows.
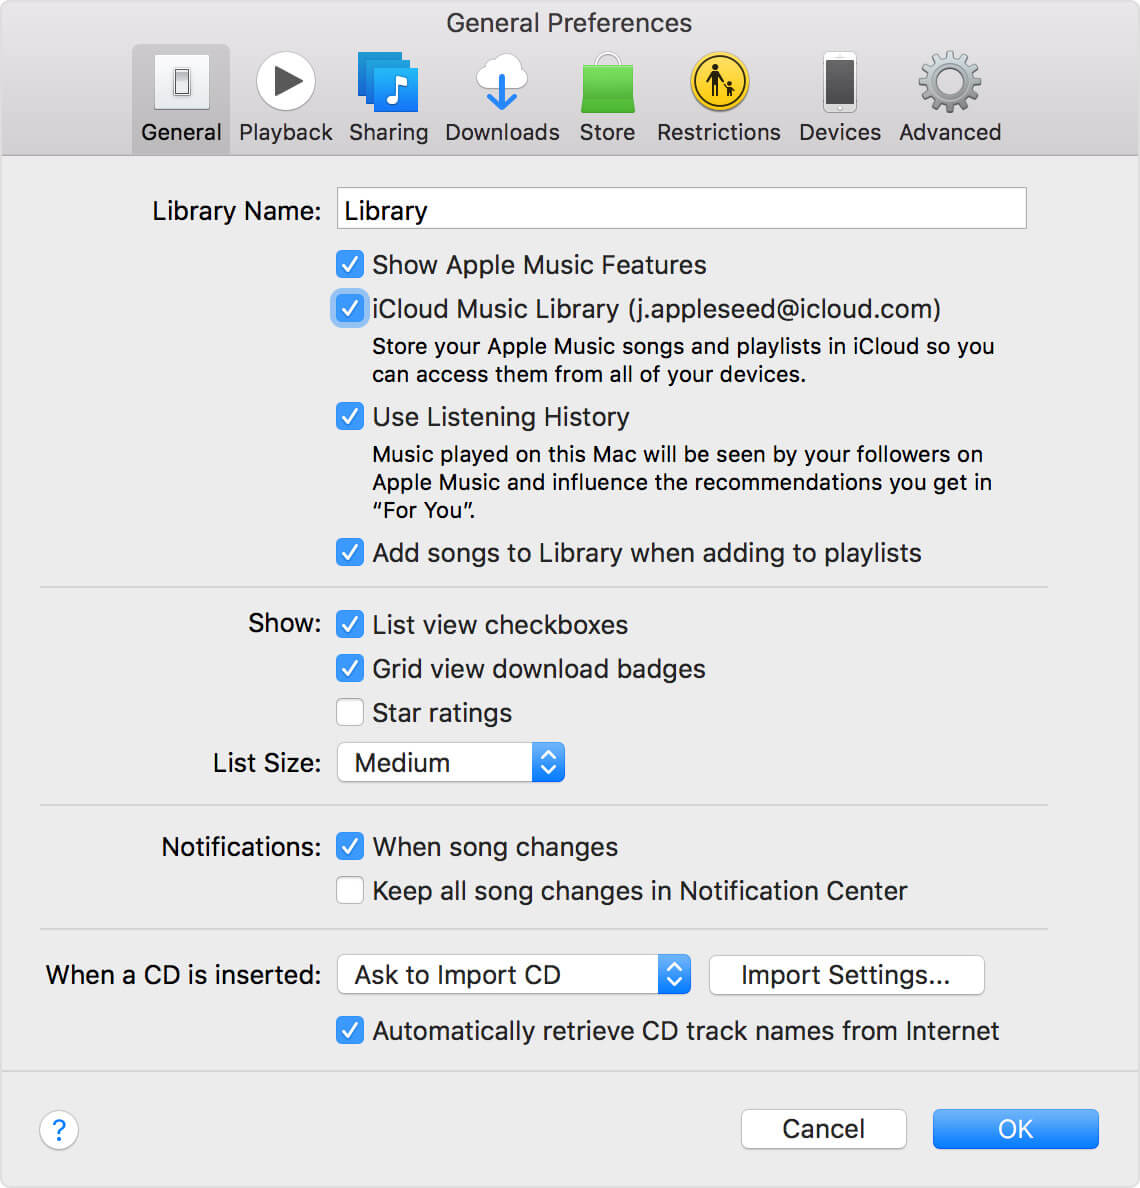
Step 3: Mac: From the menu bar at the top of your computer screen, choose iTunes > Preferences;
Windows: From the menu bar at the top of the iTunes window, choose Edit > Preferences.
Step 4: On the General tab, select iCloud Music Library to turn it on and click OK button.
Step 5: Now, we can begin move music from iPod to computer. Please click Account> Purchased on the interface of iTunes. It can only move the purchased songs.
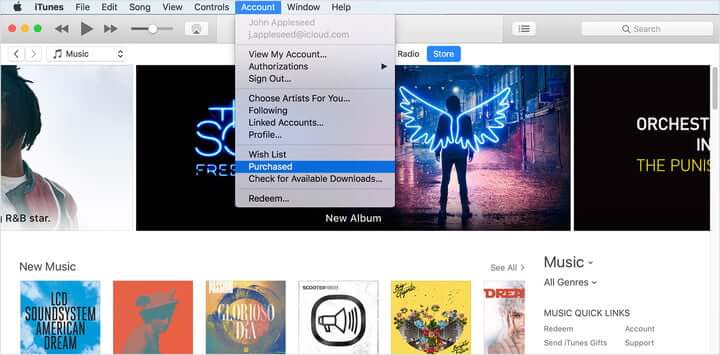
Step 6: On the interface, you will see All and Not in My Library options. Click Not in My Library, you can see all the songs that aren’t currently in iTunes.

Step 7: Finally, we can download all the songs. By the way, a good Wi-Fi connection is necessary.
Transfer data (contacts, videos, pictures, text messages and so on) for iPhone users.
You May Also Like to Read:
- How to Transfer Photos from iPhone to PC in 4 Ways?
- 4 Steps to Transfer Photos from iPhone to iPad?
- How to Transfer Photos from iPhone to Laptop without Data Rewritten?
- 3 Different Ways, How to Transfer Photos from iPhone to Mac?
- 3 Ways to Transfer Photos from PC to iPhone?
- How to Transfer Music from Computer to iPhone without iTunes?
- How to Transfer Music from iPhone to iTunes?
- How to Transfer Music from iTunes to iPhone with 2 Ways?
